You have heard that n8n can do some pretty amazing things with AI. People talk about “AI agents” like they are magic. And then you open n8n, see something called the AI Agent node, and think… okay, what even is this?
Totally normal feeling. The AI Agent node looks a bit different from regular n8n nodes. It has extra connections hanging off it. It talks about “chat models” and “memory” and “tools.” It can feel like a lot.
But here is the good news. Once you understand what each part does, building your first AI agent is actually not that hard. At BULDRR AI, we have helped hundreds of beginners set up their first agent. This guide walks you through everything, step by step, with no confusing jargon.
By the end, you will know exactly what the n8n AI Agent node does, how all the pieces connect, and you will have a working AI agent you built yourself.
What You Will Learn
- What the n8n AI Agent node actually is (in simple terms)
- The 3 things every AI agent needs: a brain, memory, and tools
- How to set up your first working AI agent step by step
- The most common beginner mistakes and how to avoid them
- Real before/after example of what a manual task looks like vs. automated
What Is the n8n AI Agent Node?
Think of a regular n8n workflow like a train on a track. The train always follows the same path. Step 1, then Step 2, then Step 3. It never changes direction on its own.
An AI agent is different. Think of it more like a taxi driver. You tell the driver where you want to go. The driver then decides the best route, handles any detours, and figures out the parking situation. You gave one instruction. The driver made all the decisions.
The n8n AI Agent node works the same way. You give it a task. It figures out what steps to take, what tools to use, and in what order. It thinks through the problem instead of just following a fixed path.
As of 2026, the AI Agent node is one of the most powerful features in n8n. It lets you build automations that can actually reason about a problem, not just execute a script.
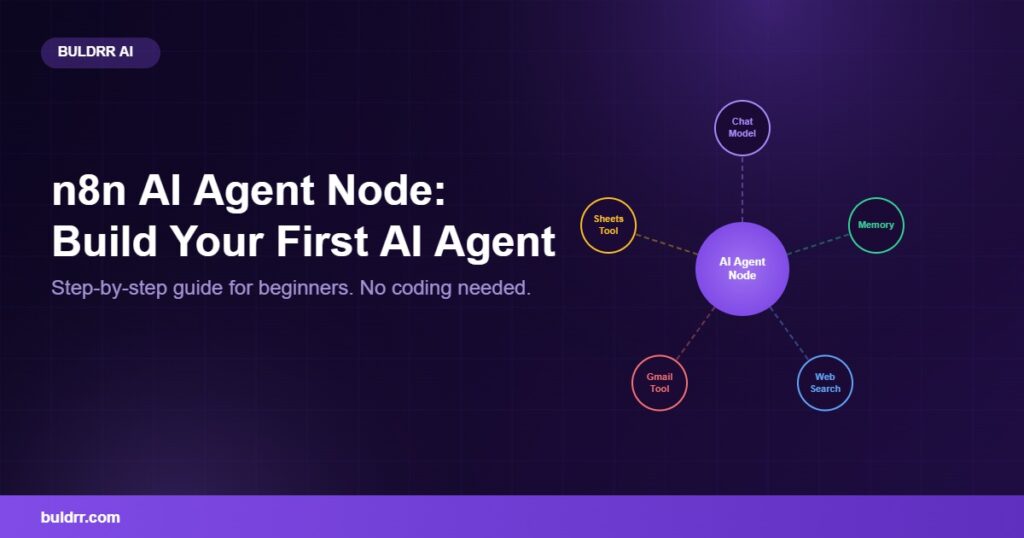
The 3 Parts Every n8n AI Agent Needs
Every working AI agent in n8n has exactly 3 parts. You need all 3 for it to work. Think of it like a car. You need the engine, the fuel tank, and the wheels. Remove any one of them, and the car goes nowhere.
1. The Chat Model (the Brain)
The Chat Model is the AI doing the thinking. This is where you connect an AI like OpenAI’s GPT-4o, Anthropic’s Claude, or Google Gemini.
Inside the AI Agent node, there is a small slot called “Chat Model.” You drag a model node into that slot. The model reads the task, thinks about it, and decides what to do next.
If you do not have a paid API key yet, no problem. You can use OpenRouter free models with n8n. OpenRouter gives you access to powerful free AI models through one API key. Check out the BULDRR AI guide on OpenRouter free models and API setup to get started without spending anything.
2. Memory (so the Agent Remembers)
Imagine you are talking to a customer service rep who forgets everything you said the second you say something new. Every reply starts from zero. Frustrating, right?
Without memory, an AI agent has the same problem. You say “my order number is 12345.” Three messages later, you mention “my order” and the agent has no idea what order you are talking about.
Memory nodes fix this. They give the agent a short-term notebook. As of 2026, n8n has several memory types:
- Simple Memory: Basic session memory. Forgets everything when the workflow stops. Good for testing.
- Postgres Memory: Saves conversation history to a database. Works long-term across sessions.
- Redis Memory: Fast memory that auto-expires after a set time. Great for chat apps.
For your first agent, Simple Memory works perfectly. You can upgrade to Postgres later when you need persistence.
3. Tools (what the Agent Can Do)
A brain without hands can not do much. Tools are the hands of your AI agent.
Tools are extra nodes you attach to the AI Agent node. They define what actions the agent is allowed to take. Examples:
- Search the web for information
- Send an email through Gmail
- Look up a record in your Google Sheets
- Post a message to Slack
- Call any API you want
Here is the important thing: the agent chooses which tool to use and when. You do not program that logic. The AI figures it out based on the task you gave it.
If you say “find me the latest news about automation tools and send a summary to my Slack,” the agent will use the web search tool first, then the Slack tool. It chains them together automatically.
How to Build Your First n8n AI Agent (Step by Step)
Okay, let us build something real. This example creates a simple AI agent that can answer questions and search the web. You will have it running in about 15 minutes.
Step 1: Open n8n and Create a New Workflow
Log in to your n8n account (cloud or self-hosted). Click the “+” button to create a new workflow. Give it a name like “My First AI Agent.”
You have a blank workflow ready.
Tip: If you are not sure whether to use n8n cloud or self-host, n8n cloud is easier to start with. Self-hosting on a VPS gives you more control and lower costs for high-volume use. BULDRR AI has a guide on setting up n8n from scratch if you need it.
Step 2: Add a Chat Trigger Node
Search for “Chat Trigger” in the node panel and add it. This is what starts the agent. It creates a simple chat interface so you can type messages to your agent.
The trigger is set. Your agent now has a way to receive input.
Tip: The Chat Trigger also handles memory automatically when connected to certain memory nodes. You do not need to configure much here.
Step 3: Add the AI Agent Node
Search for “AI Agent” in the node panel. Add it and connect it to the Chat Trigger.
When you click on the AI Agent node, you will see the settings panel open. Leave the Prompt setting as “Connected Chat Trigger Node.” This means the agent reads whatever the user typed.
You will also see empty slots labelled “Chat Model,” “Memory,” and “Tool.” These are what you fill in next.
The agent brain is added. Now it needs its three pieces.
Tip: Notice the small circle connections below the AI Agent node. Those are where you plug in the Chat Model, Memory, and Tools as sub-nodes.
Step 4: Connect a Chat Model
Click the “+” button on the “Chat Model” slot of the AI Agent node. Search for your preferred model. For example, “OpenAI Chat Model” if you have an OpenAI API key.
Add your API key in the credentials. Choose a model like gpt-4o-mini (cheap and fast) or gpt-4o (smarter but costs more).
If you want free options, use the OpenRouter credential and pick a free model like deepseek/deepseek-r1:free or meta-llama/llama-4-scout:free.
The agent now has a brain connected.
Tip: Always test with a smaller, cheaper model first. Once everything works, you can switch to a more powerful one.
Step 5: Add Simple Memory
Click the “+” on the “Memory” slot. Search for “Simple Memory” and add it.
No extra settings needed. Simple Memory works out of the box. It stores the conversation within the current session so the agent remembers what was said earlier in the chat.
The agent now remembers the conversation.
Tip: If you restart the workflow or save it, Simple Memory clears. That is normal for testing. Switch to Postgres Memory when you need permanent storage.
Step 6: Add a Tool
Click the “+” on the “Tool” slot. For a basic test, add the “Calculator” tool. It is built into n8n and needs zero setup. Now your agent can do maths when asked.
For something more useful, add the “SerpAPI” tool (web search) or an HTTP Request tool configured to call any API you use. The tools panel has dozens of options.
Your agent can now take action, not just talk.
Tip: Write clear, specific descriptions for each tool you add. The agent reads those descriptions to decide which tool to use. “Search the web for current information” is better than just “search.”
Step 7: Test Your Agent
Click “Test Workflow” in the top right. A chat panel will open at the bottom of the screen. Type a message like: “What is 234 times 56?”
Watch the agent think, use the Calculator tool, and return the answer. You just ran your first AI agent.
Agent is working end to end.
Tip: The “Execution Log” panel on the left shows every step the agent took. You can see exactly which tools it called and what data moved through each one. Use this to debug issues.
Before vs. After: What Changes with an AI Agent
Here is a real example of what life looks like before and after using an n8n AI Agent node.
Before (manual process): A customer emails your support inbox asking “What is your refund policy and can I get a refund on order #4521?” You open three tabs. You check your refund policy doc, look up order #4521 in your spreadsheet, then write a reply. This takes 8 to 10 minutes per email.
After (with AI Agent): The agent receives the email via Gmail trigger. It reads the question, checks your Google Sheets for order #4521 (using a Sheets tool), reads your refund policy from a knowledge base you uploaded, and drafts a personalised reply. You review it and send. Total time from your side: 30 seconds.
This is what AI agents make possible. Not just answering questions, but doing research, finding data, and taking action all in one flow.
Common Questions
Do I need to know coding to use the AI Agent node?
No. You can build a fully working AI agent in n8n using only the visual drag-and-drop interface. No code is needed for the core setup. If you want to add very custom logic inside a tool, you can optionally write a small JavaScript function, but that is not required to get started.
What is the difference between an AI Agent and a regular n8n workflow?
A regular workflow follows a fixed path you designed step by step. An AI agent decides its own steps based on the task you give it. The agent can use different tools in different orders depending on what the user asks. It is more flexible and handles open-ended tasks better.
Can the AI Agent node talk to external apps like Gmail or Slack?
Yes. You connect external apps as “tools” to the AI Agent node. Once connected, the agent can send emails, post messages, search spreadsheets, or call any API as part of its decision-making process. Over 1,000 app integrations are available in n8n.
What happens if the agent makes a mistake?
Agents can occasionally misunderstand a task, especially with vague instructions. You can add a “human in the loop” step where the agent drafts an action and waits for your approval before executing it. This is recommended for anything that sends emails or modifies data. You stay in control of the final action.
Do Not Worry If This Feels Confusing at First
Here is something important to know. Every single person who built a working AI agent in n8n felt confused at first. The AI Agent node looks different because it works differently. That is okay.
The best way to learn it is to build something small. Even a basic agent that answers questions using a Calculator tool is enough to understand how the pieces connect. Once that clicks, adding more tools and complexity feels natural.
You do not need to understand everything before you start. You just need to start.
Quick Recap
- The n8n AI Agent node builds automations that reason and decide, not just execute fixed steps
- Every agent needs 3 things: a Chat Model (brain), Memory (context), and Tools (actions)
- You can build your first working agent in about 15 minutes with zero coding
- Use free AI models via OpenRouter if you do not want to pay for API access
- Start simple, then add more tools and complexity once the basics work
What to Do Next
Open n8n right now and create a new workflow. Add the AI Agent node, connect a Chat Model, add Simple Memory, and attach the Calculator tool. Run it and ask it a maths question. That first working agent will make everything else in this guide click into place.
FAQ
What is the n8n AI Agent node?
The n8n AI Agent node is a special node that lets you build AI-powered automations that can reason, make decisions, and use tools dynamically. Unlike regular workflow nodes, the agent decides its own steps based on the task it receives, rather than following a fixed path you designed.
What chat models work with the n8n AI Agent node?
As of 2026, n8n supports OpenAI (GPT-4o, GPT-4o-mini), Anthropic Claude (Claude 3 and Claude 4 series), Google Gemini, Mistral, Cohere, and local models via Ollama. You can also use any OpenAI-compatible provider like OpenRouter, which gives access to 28+ free models.
Does the n8n AI Agent node need coding knowledge?
No coding is required to build a basic AI agent in n8n. The visual interface handles all connections. Optional JavaScript knowledge helps if you want to build complex custom tools, but most real-world agents can be built entirely without writing any code.
What is memory in the n8n AI Agent node?
Memory lets the AI agent remember earlier parts of a conversation. Without it, the agent forgets everything with each new message. n8n offers Simple Memory (session-only), Postgres Memory (permanent storage in a database), and Redis Memory (auto-expiring sessions). Simple Memory is the easiest way to start.
How many tools can I add to an n8n AI agent?
You can add multiple tools to a single AI Agent node. There is no strict limit, though too many tools can confuse the agent if the descriptions overlap. Most well-designed agents use between 3 and 10 tools with clear, specific descriptions so the AI picks the right one every time.
Is the n8n AI Agent node free to use?
The n8n AI Agent node itself is free and included in all n8n plans, including the self-hosted Community Edition. You do pay for the AI model API (OpenAI, Anthropic, etc.). To avoid API costs, use free models via OpenRouter with the n8n OpenAI-compatible credential and set the base URL to OpenRouter’s endpoint.
