
n8n Webhook Tutorial: Trigger Any Automation from Anywhere (2026)

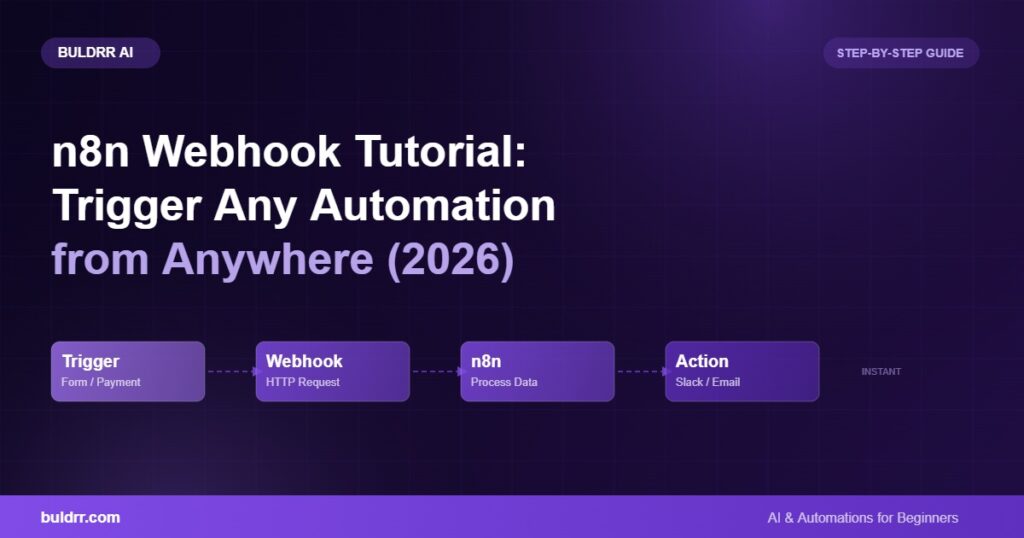
n8n webhook trigger workflow connecting external apps to automated actions
Updated: August 25, 2026

You are building an n8n workflow and you want it to start automatically when something happens in another app. A form gets submitted. A payment comes in. A customer clicks a button on your website. That is exactly what a webhook does. A webhook is just a way for one app to send a message to another app the moment something happens. n8n makes it really easy to receive those messages and take action on them instantly. This tutorial walks you through everything step by step, from complete beginner to a working webhook trigger you can actually use today.

What You Will Learn

  • What a webhook actually is, explained in plain English
  • How to set up a webhook trigger in n8n step by step
  • The difference between test mode and production mode (this trips up most beginners)
  • How to connect real apps like Typeform, Stripe, and custom forms to n8n
  • How to secure your webhook so only the right apps can trigger your workflow

What Is a Webhook? The Simple Explanation

Most apps work like a library book system. You go in, ask for information, and they give it to you. That is called polling. A webhook works the other way around. The app sends you information the moment something happens, without you having to ask for it.

Think of it this way. You order pizza. You can either call the restaurant every 5 minutes to ask if your pizza is ready (polling). Or you can give them your phone number and they text you the second it is done (webhook). One is slow and annoying. The other is instant and automatic.

In n8n, a webhook trigger starts your workflow the moment another app sends data to your unique n8n URL. No delays. No manual checking. It just runs. As of 2026, the n8n Webhook node supports GET, POST, PUT, and DELETE request types. This covers almost every real-world use case you will come across.

How to Set Up an n8n Webhook Trigger: Step by Step

Okay so here is the full process. You do not need to write any code for this. Just follow along one step at a time and you will have a working webhook trigger by the end.

Step 1: Create a New Workflow in n8n

Open your n8n editor. Click the plus button to create a new workflow. Give it a clear name like “Contact Form Handler” or “Stripe Payment Receiver”. This helps you find it later when you have many workflows running. Then click the canvas area and search for “Webhook” in the node search panel. Select the Webhook Trigger option. You will see it appear on your canvas ready to configure.

Tip: Always name your workflows clearly. Future you will thank present you when you have 50 workflows and need to find the right one fast.

Step 2: Configure the Webhook Node Settings

Click on the webhook node to open its settings panel on the right side. You will see a few important options to set. The HTTP Method should be set to POST for most use cases. Forms, Stripe, Typeform, and most modern apps send POST requests by default. For Response Mode, choose “When last node finishes” if you want to send data back to the calling app. Choose “Immediately” for faster response with no return data needed.

Tip: Most simple automations can use the default settings. You only need to change these if a specific app requires it.

Step 3: Understand Test Mode vs Production Mode

This is the step that trips up almost every beginner. There are two different webhook URLs for your trigger, and they do very different things. The Test URL is only active while you actively click “Listen for test event” inside the editor. Use this while building your workflow. The Production URL is always active whenever your workflow is switched on. Use this in your live apps.

A lot of beginners copy the test URL, paste it into Typeform or Stripe, and then wonder why nothing fires when they turn the workflow on. The fix: always switch to the production URL before going live. You can find both URLs at the top of the webhook node settings panel. They look similar but they are different URLs entirely.

Tip: Keep both URLs saved somewhere handy during testing. Switch to the production URL as your final step before sharing the workflow with the world.

Step 4: Test Your Webhook With a Real Request

Click “Listen for test event” in the webhook node. This puts n8n into listening mode. Now go to your other app and trigger the event. For example, submit your Typeform, make a test purchase in Stripe, or send a quick cURL command from your computer terminal. Your n8n editor should light up and show you the incoming data. Click through the output panel to see exactly what fields came in. This data is what the next nodes in your workflow can work with.

Tip: If you do not have an app to test with yet, use this simple command from your terminal: curl -X POST YOUR_TEST_WEBHOOK_URL -H “Content-Type: application/json” -d ‘{“name”:”Test”,”email”:”[email protected]”}’

Step 5: Build the Rest of Your Workflow

Now that you can see the incoming data, you can add nodes after the webhook. If you need a refresher on n8n nodes and how to connect them, check out the n8n complete beginner guide. Common next steps include sending an email with the Gmail node, adding a row to Google Sheets, creating a contact in your CRM, or sending a Slack message to your team channel. Connect the nodes, map the data fields you need, and build your automation. When you are happy with it, click the toggle at the top right to turn your workflow on.

Once it is on, switch to the production webhook URL. Copy it and paste it into your app’s webhook settings. Your automation is now live and will run every time the event happens, 24 hours a day.

Tip: Check the n8n Executions page after your first few live runs. It shows you each execution, what data came in, and whether each step passed or failed.

Real-World Before and After: Typeform to Slack in n8n

Here is a real automation you can build in about 15 minutes using a webhook trigger.

What it does: Every time someone submits your contact form in Typeform, n8n receives the data instantly and sends a Slack message to your team with the person’s name, email, and message.

Before this automation: You check your Typeform dashboard manually every few hours. You copy the details into Slack yourself. If your team is busy, leads wait for hours before anyone notices. That is not great for potential clients who expect a quick response.

After this automation: Your team gets an instant Slack message the moment a form is submitted. No delays. No manual checking needed. They can respond within minutes, not hours. That is a much better experience for everyone involved.

To build it: set up your webhook trigger in n8n (if you are not set up yet, our n8n complete guide has the full setup steps), add a Slack node after it, map the form fields to the Slack message, and turn the workflow on. Then go to Typeform, open your form settings, and paste the production webhook URL into the Webhooks section. That is the whole setup. Done.

How to Secure Your n8n Webhook

By default, your webhook URL is public. Anyone who knows the URL can send a request and trigger your workflow. For most simple automations this is fine. But for anything important, especially payments or customer data, you want to add a security layer. Here are three ways to do it without needing to be a developer.

Add a Secret Token Check

Most apps let you add a shared secret to their webhook settings. They include this secret in a header when they send data to your n8n URL. In n8n, add an IF node right after the webhook trigger. Check if the incoming header value matches your secret token. If it does not match, stop the workflow and return a 401 error. This filters out any random or unwanted requests.

Use IP Allowlisting

Services like Stripe publish the exact IP addresses they send webhooks from. You can check the incoming IP in n8n and reject anything that does not come from those known addresses. This is very secure for services with fixed IP ranges. You set it up once and never have to think about it again.

Signature Verification

Services like Stripe and GitHub sign their webhook payloads with a secret key. They include a special header with an HMAC signature that you can verify in n8n. Add a Code node after your webhook trigger to check the signature. If it does not match, stop the workflow. This is the most secure option for payment webhooks specifically.

Common n8n Webhook Problems and How to Fix Them

My webhook is not triggering at all

Check three things in this order. First, make sure your workflow is turned on and you are using the production URL, not the test URL. Second, check that the sending app has your n8n URL configured correctly with no typos. Third, look at the n8n Executions page to see if any requests came in but failed silently. Nine times out of ten it is the test URL vs production URL issue.

My webhook is triggering but the data looks empty

This usually means the sending app is not including the right Content-Type header. Most apps need to send a header that says “Content-Type: application/json” so n8n knows how to parse the data. Check the settings of your sending app and confirm this header is being included with every request.

The test URL stops working after a few minutes

That is by design. The test URL only works while you are actively listening in the editor. It times out after a few minutes of no activity. This is a feature, not a bug. Use the production URL for anything that needs to run in the real world with real data.

Once you are comfortable with webhooks, the next step is combining them with AI nodes inside n8n. You can read about that in the guide to building AI agents in n8n without coding.

The hardest part about webhooks is the very first one. Once you set up your first webhook trigger and see the real data come flowing in, everything just clicks. It feels like magic, right? But it is just two apps talking to each other, and you are now the one making it happen.

Quick Recap

  • A webhook starts your n8n workflow the moment something happens in another app
  • Use the Test URL while building and the Production URL when going live
  • Always turn your workflow on before switching to the production URL
  • You can secure webhooks with token checks, IP filtering, or signature verification
  • Most beginner problems come from using the test URL in a live app, or forgetting to turn the workflow on

What to Do Next

Open your n8n editor right now, add a webhook trigger to a new workflow, and connect it to a Slack node or Gmail node. Then click “Listen for test event” and send a test request to see real data come through for the first time.

FAQ

What is an n8n webhook trigger?

An n8n webhook trigger is a special node that listens for incoming HTTP requests from external apps. When a request arrives, it starts your n8n workflow automatically. It works with any app that can send a webhook, including forms, payment processors, CRMs, and custom-built apps.

What is the difference between test mode and production mode in n8n webhooks?

Test mode is only active when you manually click “Listen for test event” inside the n8n editor. It is for building and testing your workflow. Production mode is always active when your workflow is turned on. Always use the production URL in your live apps and integrations, never the test URL.

Does n8n webhook support both GET and POST requests?

Yes. n8n webhook triggers support GET, POST, PUT, and DELETE HTTP methods. Most real-world integrations use POST because it allows sending a body with data. GET is sometimes used for simple triggers or verification handshakes from apps like Stripe or Twilio.

How do I test an n8n webhook without a real external app?

Use cURL from your computer terminal. Copy the test webhook URL from n8n, click “Listen for test event,” then run this command: curl -X POST YOUR_WEBHOOK_URL -H “Content-Type: application/json” -d ‘{“name”:”test”,”email”:”[email protected]”}’. n8n will receive the data and show you the output instantly.

Is the n8n webhook URL permanent?

On self-hosted n8n, the production webhook URL stays the same as long as the workflow ID does not change. On n8n Cloud, the URL is also stable once the workflow is active and turned on. Always use the production URL in live apps, not the test URL which is session-based and temporary.

Can I use n8n webhooks with Typeform, Stripe, and Shopify?

Yes. n8n webhooks work with any app that can send an HTTP request. Popular apps including Typeform, Stripe, WooCommerce, GitHub, Shopify, and Webflow all support webhooks natively. You just copy your n8n production webhook URL and paste it into the webhook settings of the other app. That is the whole setup.

You are building an n8n workflow and you want it to start automatically when something happens in another app. A form gets submitted. A payment comes in. A customer clicks a button on your website. That is exactly what a webhook does. A webhook is just a way for one app to send a message to another app the moment something happens. n8n makes it really easy to receive those messages and take action on them instantly. This tutorial walks you through everything step by step, from complete beginner to a working webhook trigger you can actually use today.

What You Will Learn

  • What a webhook actually is, explained in plain English
  • How to set up a webhook trigger in n8n step by step
  • The difference between test mode and production mode (this trips up most beginners)
  • How to connect real apps like Typeform, Stripe, and custom forms to n8n
  • How to secure your webhook so only the right apps can trigger your workflow

What Is a Webhook? The Simple Explanation

Most apps work like a library book system. You go in, ask for information, and they give it to you. That is called polling. A webhook works the other way around. The app sends you information the moment something happens, without you having to ask for it.

Think of it this way. You order pizza. You can either call the restaurant every 5 minutes to ask if your pizza is ready (polling). Or you can give them your phone number and they text you the second it is done (webhook). One is slow and annoying. The other is instant and automatic.

In n8n, a webhook trigger starts your workflow the moment another app sends data to your unique n8n URL. No delays. No manual checking. It just runs. As of 2026, the n8n Webhook node supports GET, POST, PUT, and DELETE request types. This covers almost every real-world use case you will come across.

How to Set Up an n8n Webhook Trigger: Step by Step

Okay so here is the full process. You do not need to write any code for this. Just follow along one step at a time and you will have a working webhook trigger by the end.

Step 1: Create a New Workflow in n8n

Open your n8n editor. Click the plus button to create a new workflow. Give it a clear name like “Contact Form Handler” or “Stripe Payment Receiver”. This helps you find it later when you have many workflows running. Then click the canvas area and search for “Webhook” in the node search panel. Select the Webhook Trigger option. You will see it appear on your canvas ready to configure.

Tip: Always name your workflows clearly. Future you will thank present you when you have 50 workflows and need to find the right one fast.

Step 2: Configure the Webhook Node Settings

Click on the webhook node to open its settings panel on the right side. You will see a few important options to set. The HTTP Method should be set to POST for most use cases. Forms, Stripe, Typeform, and most modern apps send POST requests by default. For Response Mode, choose “When last node finishes” if you want to send data back to the calling app. Choose “Immediately” for faster response with no return data needed.

Tip: Most simple automations can use the default settings. You only need to change these if a specific app requires it.

Step 3: Understand Test Mode vs Production Mode

This is the step that trips up almost every beginner. There are two different webhook URLs for your trigger, and they do very different things. The Test URL is only active while you actively click “Listen for test event” inside the editor. Use this while building your workflow. The Production URL is always active whenever your workflow is switched on. Use this in your live apps.

A lot of beginners copy the test URL, paste it into Typeform or Stripe, and then wonder why nothing fires when they turn the workflow on. The fix: always switch to the production URL before going live. You can find both URLs at the top of the webhook node settings panel. They look similar but they are different URLs entirely.

Tip: Keep both URLs saved somewhere handy during testing. Switch to the production URL as your final step before sharing the workflow with the world.

Step 4: Test Your Webhook With a Real Request

Click “Listen for test event” in the webhook node. This puts n8n into listening mode. Now go to your other app and trigger the event. For example, submit your Typeform, make a test purchase in Stripe, or send a quick cURL command from your computer terminal. Your n8n editor should light up and show you the incoming data. Click through the output panel to see exactly what fields came in. This data is what the next nodes in your workflow can work with.

Tip: If you do not have an app to test with yet, use this simple command from your terminal: curl -X POST YOUR_TEST_WEBHOOK_URL -H “Content-Type: application/json” -d ‘{“name”:”Test”,”email”:”[email protected]”}’

Step 5: Build the Rest of Your Workflow

Now that you can see the incoming data, you can add nodes after the webhook. If you need a refresher on n8n nodes and how to connect them, check out the n8n complete beginner guide. Common next steps include sending an email with the Gmail node, adding a row to Google Sheets, creating a contact in your CRM, or sending a Slack message to your team channel. Connect the nodes, map the data fields you need, and build your automation. When you are happy with it, click the toggle at the top right to turn your workflow on.

Once it is on, switch to the production webhook URL. Copy it and paste it into your app’s webhook settings. Your automation is now live and will run every time the event happens, 24 hours a day.

Tip: Check the n8n Executions page after your first few live runs. It shows you each execution, what data came in, and whether each step passed or failed.

Real-World Before and After: Typeform to Slack in n8n

Here is a real automation you can build in about 15 minutes using a webhook trigger.

What it does: Every time someone submits your contact form in Typeform, n8n receives the data instantly and sends a Slack message to your team with the person’s name, email, and message.

Before this automation: You check your Typeform dashboard manually every few hours. You copy the details into Slack yourself. If your team is busy, leads wait for hours before anyone notices. That is not great for potential clients who expect a quick response.

After this automation: Your team gets an instant Slack message the moment a form is submitted. No delays. No manual checking needed. They can respond within minutes, not hours. That is a much better experience for everyone involved.

To build it: set up your webhook trigger in n8n (if you are not set up yet, our n8n complete guide has the full setup steps), add a Slack node after it, map the form fields to the Slack message, and turn the workflow on. Then go to Typeform, open your form settings, and paste the production webhook URL into the Webhooks section. That is the whole setup. Done.

How to Secure Your n8n Webhook

By default, your webhook URL is public. Anyone who knows the URL can send a request and trigger your workflow. For most simple automations this is fine. But for anything important, especially payments or customer data, you want to add a security layer. Here are three ways to do it without needing to be a developer.

Add a Secret Token Check

Most apps let you add a shared secret to their webhook settings. They include this secret in a header when they send data to your n8n URL. In n8n, add an IF node right after the webhook trigger. Check if the incoming header value matches your secret token. If it does not match, stop the workflow and return a 401 error. This filters out any random or unwanted requests.

Use IP Allowlisting

Services like Stripe publish the exact IP addresses they send webhooks from. You can check the incoming IP in n8n and reject anything that does not come from those known addresses. This is very secure for services with fixed IP ranges. You set it up once and never have to think about it again.

Signature Verification

Services like Stripe and GitHub sign their webhook payloads with a secret key. They include a special header with an HMAC signature that you can verify in n8n. Add a Code node after your webhook trigger to check the signature. If it does not match, stop the workflow. This is the most secure option for payment webhooks specifically.

Common n8n Webhook Problems and How to Fix Them

My webhook is not triggering at all

Check three things in this order. First, make sure your workflow is turned on and you are using the production URL, not the test URL. Second, check that the sending app has your n8n URL configured correctly with no typos. Third, look at the n8n Executions page to see if any requests came in but failed silently. Nine times out of ten it is the test URL vs production URL issue.

My webhook is triggering but the data looks empty

This usually means the sending app is not including the right Content-Type header. Most apps need to send a header that says “Content-Type: application/json” so n8n knows how to parse the data. Check the settings of your sending app and confirm this header is being included with every request.

The test URL stops working after a few minutes

That is by design. The test URL only works while you are actively listening in the editor. It times out after a few minutes of no activity. This is a feature, not a bug. Use the production URL for anything that needs to run in the real world with real data.

Once you are comfortable with webhooks, the next step is combining them with AI nodes inside n8n. You can read about that in the guide to building AI agents in n8n without coding.

The hardest part about webhooks is the very first one. Once you set up your first webhook trigger and see the real data come flowing in, everything just clicks. It feels like magic, right? But it is just two apps talking to each other, and you are now the one making it happen.

Quick Recap

  • A webhook starts your n8n workflow the moment something happens in another app
  • Use the Test URL while building and the Production URL when going live
  • Always turn your workflow on before switching to the production URL
  • You can secure webhooks with token checks, IP filtering, or signature verification
  • Most beginner problems come from using the test URL in a live app, or forgetting to turn the workflow on

What to Do Next

Open your n8n editor right now, add a webhook trigger to a new workflow, and connect it to a Slack node or Gmail node. Then click “Listen for test event” and send a test request to see real data come through for the first time.

FAQ

What is an n8n webhook trigger?

An n8n webhook trigger is a special node that listens for incoming HTTP requests from external apps. When a request arrives, it starts your n8n workflow automatically. It works with any app that can send a webhook, including forms, payment processors, CRMs, and custom-built apps.

What is the difference between test mode and production mode in n8n webhooks?

Test mode is only active when you manually click “Listen for test event” inside the n8n editor. It is for building and testing your workflow. Production mode is always active when your workflow is turned on. Always use the production URL in your live apps and integrations, never the test URL.

Does n8n webhook support both GET and POST requests?

Yes. n8n webhook triggers support GET, POST, PUT, and DELETE HTTP methods. Most real-world integrations use POST because it allows sending a body with data. GET is sometimes used for simple triggers or verification handshakes from apps like Stripe or Twilio.

How do I test an n8n webhook without a real external app?

Use cURL from your computer terminal. Copy the test webhook URL from n8n, click “Listen for test event,” then run this command: curl -X POST YOUR_WEBHOOK_URL -H “Content-Type: application/json” -d ‘{“name”:”test”,”email”:”[email protected]”}’. n8n will receive the data and show you the output instantly.

Is the n8n webhook URL permanent?

On self-hosted n8n, the production webhook URL stays the same as long as the workflow ID does not change. On n8n Cloud, the URL is also stable once the workflow is active and turned on. Always use the production URL in live apps, not the test URL which is session-based and temporary.

Can I use n8n webhooks with Typeform, Stripe, and Shopify?

Yes. n8n webhooks work with any app that can send an HTTP request. Popular apps including Typeform, Stripe, WooCommerce, GitHub, Shopify, and Webflow all support webhooks natively. You just copy your n8n production webhook URL and paste it into the webhook settings of the other app. That is the whole setup.

Author
Written By
Vikash Kumar
Building AI agents, n8n workflows and end-to-end automation for 30+ Brands across India, the US, Europe, Dubai & Australia. 7+ years of Experience saving founders real hours every week - no code required.
Ask more Questions about this Blog with AI:

Our AI Articles

Learn from our AI Articles to excel in your profession ;)

n8n Pricing 2026: Free Self-Hosted vs Cloud Costs Explained

n8n pricing broken down for 2026: every Cloud plan cost, real self-hosted server prices, and how to pick the option...

n8n MCP: How to Connect AI Agents to Any Tool (2026)

n8n MCP lets your AI agent connect to any tool through one shared standard, no custom code needed. Here is...

Lara Acosta LinkedIn Templates and Hooks (2026 Examples)

Copy Lara Acosta LinkedIn templates and hook examples, plus the SLAY framework, to write posts that get read. A simple...

n8n Docker Setup: Install n8n the Easy Way (2026 Guide)

Learn how to install n8n with Docker step by step. A beginner-friendly 2026 guide to run n8n on your own...

How to Self Host n8n for Free: The Beginner VPS Setup Guide (2026)

The n8n cloud version has a free trial that runs out. After that, you pay a monthly fee for every...

10 Best n8n Workflows Every Business Should Automate

Manual work is killing business speed. In 2026, companies that still copy-paste data between apps are already behind. This is...

Automating the First 14 Days After Someone Buys From You

How to automate the first 14 days after a sale closes — welcome messages, account setup, kickoff booking, and day-7/day-14...

10 Questions to Ask Before Hiring an n8n Automation Agency

Before hiring an n8n automation agency, ask about their pricing model (per-workflow vs retainer), who owns the finished workflows, how...

n8n vs Zapier vs Make: Which Automation Tool is Best for Business

n8n is the best fit for businesses that want self-hosting, unlimited executions, and deep AI-agent capability and have some technical...

How to Use OpenRouter with n8n: Free AI Workflows (No Card Needed)

You keep hearing about AI automation but every option seems to cost money. ChatGPT Plus is $20 a month. Claude...

How to Automate Lead Follow-Up Calls with AI: A Step-by-Step Guide

Here is a number that should worry every business owner: leads that are called within five minutes of showing interest...

10 Claude Tips: From Using 10% of Claude to Actually Using It

A practical guide to getting more out of Claude, this post shares 10 tips from beginner to advanced, including choosing...
1:1 Free Strategy Session
Your competitors are already automating. Are you still paying for it manually?

Do you want to adopt AI Automation?

Every hour your team does repetitive work, you're burning real money.
While you wait, faster businesses are cutting costs and moving quicker.
AI and automations aren't the future anymore — they're the present.

Book a live 1-on-1 session where we show you exactly which of your daily tasks can be automated — and what it’s costing you not to.