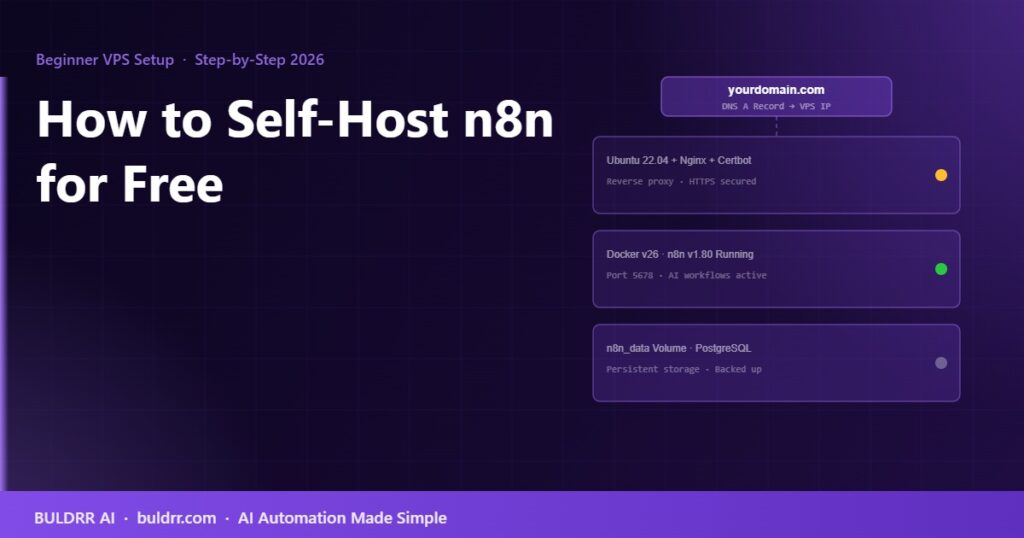
The n8n cloud version has a free trial that runs out. After that, you pay a monthly fee for every workflow you run. That adds up fast if you are running automations around the clock.
Self-hosting n8n on your own server changes that completely. You pay once for the server, and n8n runs forever for free. No workflow limits. No monthly per-seat pricing. No one telling you how many active workflows you can have.
This guide walks you through getting your own n8n instance running on a VPS in under 30 minutes, step by step, without needing to be a developer.
What You Need Before You Start
Before running any commands, you need three things:
- A VPS (virtual private server). This is a small online computer that runs 24/7 so your automations keep working even when your laptop is off. For n8n, the minimum specs are 1 vCPU and 2GB RAM. A reliable VPS plan starts around $4 to $6 per month. Pick Ubuntu 22.04 as the operating system when you set it up.
- A domain name. You need a domain (like yourbrand.com or n8n.yourbrand.com) pointed at your server’s IP address. You can get a domain for about $10 per year. A subdomain like
n8n.yourdomain.com works perfectly and keeps things organized. - An email address. Used only for generating your free SSL certificate through Let’s Encrypt. No account required.
Before this setup exists: your automations depend on n8n’s cloud servers, your free trial is counting down, and you are paying per workflow once the trial ends.
After this setup exists: your automations run on your own server 24/7. n8n is free forever. Your workflows have no limits. You control everything.
What VPS Should You Use?
Think of a VPS like renting a small apartment for your automations. The apartment (server) is always on, always connected to the internet, and does not care whether your laptop is open or closed.
For n8n, you do not need a big server. The minimum that runs smoothly is:
- 1 vCPU (2 vCPU preferred)
- 2GB RAM
- 20GB storage
- Ubuntu 22.04 LTS operating system
Most VPS providers offer this for $4 to $8 per month. Popular options include DigitalOcean, Linode (now Akamai), Hetzner, and Vultr. When you set up your server, always choose Ubuntu 22.04 LTS as the operating system. Other Linux versions work too, but Ubuntu 22.04 is the most tested and the one this guide follows.
Step-by-Step: Install n8n on a VPS with Docker
Step 1. Point Your Domain to Your Server
Before anything else, go to your domain provider’s DNS settings and create an A record pointing to your server’s IP address.
If your server’s IP is 123.456.78.90 and you want n8n at n8n.yourdomain.com, create this record:
Type: A
Name: n8n
Value: 123.456.78.90
TTL: 300
DNS changes can take up to 30 minutes to spread across the internet. While you wait, move to Step 2.
✓ Done when: You can ping your domain name and see your server’s IP address returned
Step 2. Connect to Your Server
Open your terminal (on Mac) or PowerShell (on Windows) and connect to your server via SSH:
Replace YOUR-SERVER-IP with the actual IP address from your VPS dashboard. Type “yes” if asked to confirm the connection, then enter your server password.
You should now see a command prompt that looks like root@your-server:~#
✓ Done when: You see the server’s command prompt in your terminal window
Step 3. Update the Server and Install Docker
Run these commands one at a time. Each one updates the server and installs the tools n8n needs:
# Update package list
apt update && apt upgrade -y

# Install Docker
curl -fsSL https://get.docker.com | sh

# Install Docker Compose
apt install docker-compose-plugin -y

# Verify both installed correctly
docker --version
docker compose version
You should see version numbers for both Docker and Docker Compose after the last two commands. If you do, the installations worked.
✓ Done when: Both docker --version and docker compose version return version numbers
Step 4. Create the n8n Folder and Config File
# Create a folder for n8n
mkdir /opt/n8n && cd /opt/n8n

# Create the Docker Compose config file
nano docker-compose.yml
A text editor will open. Paste in the following configuration exactly. Replace n8n.yourdomain.com with your actual subdomain, and replace [email protected] with your real email address:
version: '3.8'

services:
  n8n:
    image: docker.n8n.io/n8nio/n8n:latest
    restart: always
    ports:
      - "5678:5678"
    environment:
      - N8N_HOST=n8n.yourdomain.com
      - N8N_PORT=5678
      - N8N_PROTOCOL=https
      - NODE_ENV=production
      - WEBHOOK_URL=https://n8n.yourdomain.com/
      - GENERIC_TIMEZONE=UTC
      - N8N_ENCRYPTION_KEY=changethisnowtoarandomstring32chars
    volumes:
      - n8n_data:/home/node/.n8n

volumes:
  n8n_data:
Save the file by pressing Ctrl+O, then Enter, then Ctrl+X to exit the editor.
Important: Change changethisnowtoarandomstring32chars to any random string of at least 32 characters. This encrypts your credentials. You can generate one at random.org or just type a random mix of letters and numbers.
✓ Done when: The docker-compose.yml file is saved in /opt/n8n
Step 5. Set Up Nginx as a Reverse Proxy
Nginx sits in front of n8n and handles incoming web traffic. It also manages your SSL certificate so n8n runs on HTTPS instead of plain HTTP.
# Install Nginx and Certbot
apt install nginx certbot python3-certbot-nginx -y

# Start Nginx
systemctl start nginx
systemctl enable nginx
Now create an Nginx config file for your n8n subdomain:
nano /etc/nginx/sites-available/n8n
Paste this in, replacing n8n.yourdomain.com with your subdomain:
server {
    listen 80;
    server_name n8n.yourdomain.com;

    location / {
        proxy_pass http://localhost:5678;
        proxy_http_version 1.1;
        proxy_set_header Upgrade $http_upgrade;
        proxy_set_header Connection 'upgrade';
        proxy_set_header Host $host;
        proxy_cache_bypass $http_upgrade;
        proxy_set_header X-Real-IP $remote_addr;
        proxy_set_header X-Forwarded-For $proxy_add_x_forwarded_for;
        proxy_set_header X-Forwarded-Proto $scheme;
        chunked_transfer_encoding on;
        proxy_buffering off;
    }
}
Save and close the file, then activate it:
# Activate the config
ln -s /etc/nginx/sites-available/n8n /etc/nginx/sites-enabled/

# Test for errors
nginx -t

# Reload Nginx
systemctl reload nginx
✓ Done when: nginx -t returns “syntax is ok” and “test is successful”
Step 6. Get Your Free SSL Certificate
certbot --nginx -d n8n.yourdomain.com --email [email protected] --agree-tos --no-eff-email
Certbot will contact Let’s Encrypt, verify your domain, and install the SSL certificate automatically. It also adds an auto-renewal rule so the certificate renews itself every 90 days without you doing anything.
✓ Done when: Certbot says “Congratulations! Your certificate and chain have been saved”
Step 7. Start n8n
cd /opt/n8n
docker compose up -d
The -d flag runs n8n in the background so it keeps going even if you close your terminal window. The first time this runs, Docker downloads the n8n image, which takes about 1 to 2 minutes depending on your server’s internet speed.
Check that n8n started correctly:
You should see a line that says something like: n8n ready on 0.0.0.0, port 5678
✓ Done when: You see the “ready on port 5678” line in the logs
Step 8. Open n8n in Your Browser
Go to https://n8n.yourdomain.com in your browser.
You will see the n8n setup wizard asking you to create an account. This account is stored locally on your server only. Enter your name, email, and a password, then click “Get started.”
You are now inside your own self-hosted n8n instance, running 24/7 on your VPS, with no usage limits and no monthly fees beyond your hosting cost.
✓ Done when: You see the n8n dashboard at your domain
How to Keep n8n Running After Server Reboots
The restart: always line in your docker-compose.yml file handles this automatically. If your server restarts for any reason (updates, power cycle, crash), Docker automatically brings n8n back up.
You can verify this by running:
If n8n shows as “Up” in the Status column, it is running. If it shows as “Exited,” run docker compose up -d to start it again.
How to Update n8n When New Versions Come Out
n8n releases updates regularly. To update your self-hosted instance:
cd /opt/n8n
docker compose pull
docker compose up -d
This downloads the latest n8n image and restarts the container with the new version. Your workflows and credentials are stored in the n8n_data volume and are not affected by updates.
Server Size vs. Number of Workflows
| VPS Size | RAM | Good For | Approx. Monthly Cost |
|---|
| Starter | 2GB | 1 to 5 workflows, learning, personal projects | $4 to $6 |
| Standard | 4GB | 5 to 20 active workflows, small business use | $10 to $15 |
| Production | 8GB+ | 20+ workflows, high-frequency automations, client work | $20 to $40 |
Start with the 2GB Starter plan. You can upgrade anytime by resizing your VPS in the hosting control panel. Your data, workflows, and configurations stay intact during a resize.
Common Issues and How to Fix Them
Problem: n8n is not accessible at my domain after setup
Check that your DNS A record is pointing to the correct server IP. DNS changes can take up to 30 minutes. Also check that Nginx is running with systemctl status nginx.
Problem: SSL certificate failed to install
Make sure your domain DNS has fully propagated before running Certbot. Also check that port 80 is open on your server’s firewall. Run ufw allow 80 and ufw allow 443 to open both ports.
Problem: n8n shows a blank page or error after starting
Run docker compose logs inside your /opt/n8n folder to see the error details. The most common cause is an incorrect environment variable in the docker-compose.yml file, usually the domain name or encryption key.
Problem: Webhooks are not receiving data
Make sure WEBHOOK_URL in your docker-compose.yml file matches your actual domain, including the trailing slash: https://n8n.yourdomain.com/
Frequently Asked Questions
Is self-hosted n8n really free?
Yes. n8n is open-source software under a sustainable use license. Self-hosting is completely free for personal use and internal business use. You only pay for the VPS server itself, which starts at around $4 to $6 per month. There are no per-workflow fees, no seat limits, and no usage caps on the software itself.
Do I need to know how to code to self-host n8n?
You do not need to write code. You do need to be comfortable running a few commands in a terminal. This guide uses only copy-paste commands. If you have never used a terminal before, expect to spend an extra 20 to 30 minutes getting comfortable with the interface before starting.
What happens if my server goes down?
Your workflows stop running until the server comes back online. Most VPS providers guarantee 99.9% uptime, which means less than 9 hours of downtime per year. For scheduled workflows, n8n also has a built-in retry mechanism that can re-run missed executions after a restart.
Can I run other things on the same server as n8n?
Yes. A 4GB VPS can comfortably run n8n plus other small services like a database, a simple web app, or other Docker containers. Keep an eye on RAM usage with free -m and upgrade your server if it consistently runs above 80% memory usage.
How do I back up my n8n data?
Your workflows and credentials are stored in the n8n_data Docker volume at /var/lib/docker/volumes/n8n_n8n_data. Back this folder up regularly using a cron job or your VPS provider’s snapshot feature. Most VPS providers offer automated daily backups for a small additional fee.
Is self-hosted n8n better than n8n Cloud?
For most individual users and small businesses, self-hosted n8n is cheaper and more flexible. You get unlimited workflows and no monthly per-seat pricing. The trade-off is that you manage the server yourself, including updates and backups. n8n Cloud is better if you want zero server management and are okay paying for that convenience.
Your Next Step
Get your VPS. Pick the 2GB plan, install Ubuntu 22.04, and note your server’s IP address. That is the only thing you need before starting this guide. The rest takes about 20 minutes once you are connected.
Once n8n is running on your own server, the next step is connecting your first AI model to it. BULDRR AI’s guide on using OpenRouter with n8n shows you exactly how to add a free AI model to your self-hosted instance and run your first AI-powered workflow.
The n8n cloud version has a free trial that runs out. After that, you pay a monthly fee for every workflow you run. That adds up fast if you are running automations around the clock.
Self-hosting n8n on your own server changes that completely. You pay once for the server, and n8n runs forever for free. No workflow limits. No monthly per-seat pricing. No one telling you how many active workflows you can have.
This guide walks you through getting your own n8n instance running on a VPS in under 30 minutes, step by step, without needing to be a developer.
What You Need Before You Start
Before running any commands, you need three things:
- A VPS (virtual private server). This is a small online computer that runs 24/7 so your automations keep working even when your laptop is off. For n8n, the minimum specs are 1 vCPU and 2GB RAM. A reliable VPS plan starts around $4 to $6 per month. Pick Ubuntu 22.04 as the operating system when you set it up.
- A domain name. You need a domain (like yourbrand.com or n8n.yourbrand.com) pointed at your server’s IP address. You can get a domain for about $10 per year. A subdomain like
n8n.yourdomain.com works perfectly and keeps things organized. - An email address. Used only for generating your free SSL certificate through Let’s Encrypt. No account required.
Before this setup exists: your automations depend on n8n’s cloud servers, your free trial is counting down, and you are paying per workflow once the trial ends.
After this setup exists: your automations run on your own server 24/7. n8n is free forever. Your workflows have no limits. You control everything.
What VPS Should You Use?
Think of a VPS like renting a small apartment for your automations. The apartment (server) is always on, always connected to the internet, and does not care whether your laptop is open or closed.
For n8n, you do not need a big server. The minimum that runs smoothly is:
- 1 vCPU (2 vCPU preferred)
- 2GB RAM
- 20GB storage
- Ubuntu 22.04 LTS operating system
Most VPS providers offer this for $4 to $8 per month. Popular options include DigitalOcean, Linode (now Akamai), Hetzner, and Vultr. When you set up your server, always choose Ubuntu 22.04 LTS as the operating system. Other Linux versions work too, but Ubuntu 22.04 is the most tested and the one this guide follows.
Step-by-Step: Install n8n on a VPS with Docker
Step 1. Point Your Domain to Your Server
Before anything else, go to your domain provider’s DNS settings and create an A record pointing to your server’s IP address.
If your server’s IP is 123.456.78.90 and you want n8n at n8n.yourdomain.com, create this record:
Type: A
Name: n8n
Value: 123.456.78.90
TTL: 300
DNS changes can take up to 30 minutes to spread across the internet. While you wait, move to Step 2.
✓ Done when: You can ping your domain name and see your server’s IP address returned
Step 2. Connect to Your Server
Open your terminal (on Mac) or PowerShell (on Windows) and connect to your server via SSH:
Replace YOUR-SERVER-IP with the actual IP address from your VPS dashboard. Type “yes” if asked to confirm the connection, then enter your server password.
You should now see a command prompt that looks like root@your-server:~#
✓ Done when: You see the server’s command prompt in your terminal window
Step 3. Update the Server and Install Docker
Run these commands one at a time. Each one updates the server and installs the tools n8n needs:
# Update package list
apt update && apt upgrade -y

# Install Docker
curl -fsSL https://get.docker.com | sh

# Install Docker Compose
apt install docker-compose-plugin -y

# Verify both installed correctly
docker --version
docker compose version
You should see version numbers for both Docker and Docker Compose after the last two commands. If you do, the installations worked.
✓ Done when: Both docker --version and docker compose version return version numbers
Step 4. Create the n8n Folder and Config File
# Create a folder for n8n
mkdir /opt/n8n && cd /opt/n8n

# Create the Docker Compose config file
nano docker-compose.yml
A text editor will open. Paste in the following configuration exactly. Replace n8n.yourdomain.com with your actual subdomain, and replace [email protected] with your real email address:
version: '3.8'

services:
  n8n:
    image: docker.n8n.io/n8nio/n8n:latest
    restart: always
    ports:
      - "5678:5678"
    environment:
      - N8N_HOST=n8n.yourdomain.com
      - N8N_PORT=5678
      - N8N_PROTOCOL=https
      - NODE_ENV=production
      - WEBHOOK_URL=https://n8n.yourdomain.com/
      - GENERIC_TIMEZONE=UTC
      - N8N_ENCRYPTION_KEY=changethisnowtoarandomstring32chars
    volumes:
      - n8n_data:/home/node/.n8n

volumes:
  n8n_data:
Save the file by pressing Ctrl+O, then Enter, then Ctrl+X to exit the editor.
Important: Change changethisnowtoarandomstring32chars to any random string of at least 32 characters. This encrypts your credentials. You can generate one at random.org or just type a random mix of letters and numbers.
✓ Done when: The docker-compose.yml file is saved in /opt/n8n
Step 5. Set Up Nginx as a Reverse Proxy
Nginx sits in front of n8n and handles incoming web traffic. It also manages your SSL certificate so n8n runs on HTTPS instead of plain HTTP.
# Install Nginx and Certbot
apt install nginx certbot python3-certbot-nginx -y

# Start Nginx
systemctl start nginx
systemctl enable nginx
Now create an Nginx config file for your n8n subdomain:
nano /etc/nginx/sites-available/n8n
Paste this in, replacing n8n.yourdomain.com with your subdomain:
server {
    listen 80;
    server_name n8n.yourdomain.com;

    location / {
        proxy_pass http://localhost:5678;
        proxy_http_version 1.1;
        proxy_set_header Upgrade $http_upgrade;
        proxy_set_header Connection 'upgrade';
        proxy_set_header Host $host;
        proxy_cache_bypass $http_upgrade;
        proxy_set_header X-Real-IP $remote_addr;
        proxy_set_header X-Forwarded-For $proxy_add_x_forwarded_for;
        proxy_set_header X-Forwarded-Proto $scheme;
        chunked_transfer_encoding on;
        proxy_buffering off;
    }
}
Save and close the file, then activate it:
# Activate the config
ln -s /etc/nginx/sites-available/n8n /etc/nginx/sites-enabled/

# Test for errors
nginx -t

# Reload Nginx
systemctl reload nginx
✓ Done when: nginx -t returns “syntax is ok” and “test is successful”
Step 6. Get Your Free SSL Certificate
certbot --nginx -d n8n.yourdomain.com --email [email protected] --agree-tos --no-eff-email
Certbot will contact Let’s Encrypt, verify your domain, and install the SSL certificate automatically. It also adds an auto-renewal rule so the certificate renews itself every 90 days without you doing anything.
✓ Done when: Certbot says “Congratulations! Your certificate and chain have been saved”
Step 7. Start n8n
cd /opt/n8n
docker compose up -d
The -d flag runs n8n in the background so it keeps going even if you close your terminal window. The first time this runs, Docker downloads the n8n image, which takes about 1 to 2 minutes depending on your server’s internet speed.
Check that n8n started correctly:
You should see a line that says something like: n8n ready on 0.0.0.0, port 5678
✓ Done when: You see the “ready on port 5678” line in the logs
Step 8. Open n8n in Your Browser
Go to https://n8n.yourdomain.com in your browser.
You will see the n8n setup wizard asking you to create an account. This account is stored locally on your server only. Enter your name, email, and a password, then click “Get started.”
You are now inside your own self-hosted n8n instance, running 24/7 on your VPS, with no usage limits and no monthly fees beyond your hosting cost.
✓ Done when: You see the n8n dashboard at your domain
How to Keep n8n Running After Server Reboots
The restart: always line in your docker-compose.yml file handles this automatically. If your server restarts for any reason (updates, power cycle, crash), Docker automatically brings n8n back up.
You can verify this by running:
If n8n shows as “Up” in the Status column, it is running. If it shows as “Exited,” run docker compose up -d to start it again.
How to Update n8n When New Versions Come Out
n8n releases updates regularly. To update your self-hosted instance:
cd /opt/n8n
docker compose pull
docker compose up -d
This downloads the latest n8n image and restarts the container with the new version. Your workflows and credentials are stored in the n8n_data volume and are not affected by updates.
Server Size vs. Number of Workflows
| VPS Size | RAM | Good For | Approx. Monthly Cost |
|---|
| Starter | 2GB | 1 to 5 workflows, learning, personal projects | $4 to $6 |
| Standard | 4GB | 5 to 20 active workflows, small business use | $10 to $15 |
| Production | 8GB+ | 20+ workflows, high-frequency automations, client work | $20 to $40 |
Start with the 2GB Starter plan. You can upgrade anytime by resizing your VPS in the hosting control panel. Your data, workflows, and configurations stay intact during a resize.
Common Issues and How to Fix Them
Problem: n8n is not accessible at my domain after setup
Check that your DNS A record is pointing to the correct server IP. DNS changes can take up to 30 minutes. Also check that Nginx is running with systemctl status nginx.
Problem: SSL certificate failed to install
Make sure your domain DNS has fully propagated before running Certbot. Also check that port 80 is open on your server’s firewall. Run ufw allow 80 and ufw allow 443 to open both ports.
Problem: n8n shows a blank page or error after starting
Run docker compose logs inside your /opt/n8n folder to see the error details. The most common cause is an incorrect environment variable in the docker-compose.yml file, usually the domain name or encryption key.
Problem: Webhooks are not receiving data
Make sure WEBHOOK_URL in your docker-compose.yml file matches your actual domain, including the trailing slash: https://n8n.yourdomain.com/
Frequently Asked Questions
Is self-hosted n8n really free?
Yes. n8n is open-source software under a sustainable use license. Self-hosting is completely free for personal use and internal business use. You only pay for the VPS server itself, which starts at around $4 to $6 per month. There are no per-workflow fees, no seat limits, and no usage caps on the software itself.
Do I need to know how to code to self-host n8n?
You do not need to write code. You do need to be comfortable running a few commands in a terminal. This guide uses only copy-paste commands. If you have never used a terminal before, expect to spend an extra 20 to 30 minutes getting comfortable with the interface before starting.
What happens if my server goes down?
Your workflows stop running until the server comes back online. Most VPS providers guarantee 99.9% uptime, which means less than 9 hours of downtime per year. For scheduled workflows, n8n also has a built-in retry mechanism that can re-run missed executions after a restart.
Can I run other things on the same server as n8n?
Yes. A 4GB VPS can comfortably run n8n plus other small services like a database, a simple web app, or other Docker containers. Keep an eye on RAM usage with free -m and upgrade your server if it consistently runs above 80% memory usage.
How do I back up my n8n data?
Your workflows and credentials are stored in the n8n_data Docker volume at /var/lib/docker/volumes/n8n_n8n_data. Back this folder up regularly using a cron job or your VPS provider’s snapshot feature. Most VPS providers offer automated daily backups for a small additional fee.
Is self-hosted n8n better than n8n Cloud?
For most individual users and small businesses, self-hosted n8n is cheaper and more flexible. You get unlimited workflows and no monthly per-seat pricing. The trade-off is that you manage the server yourself, including updates and backups. n8n Cloud is better if you want zero server management and are okay paying for that convenience.
Your Next Step
Get your VPS. Pick the 2GB plan, install Ubuntu 22.04, and note your server’s IP address. That is the only thing you need before starting this guide. The rest takes about 20 minutes once you are connected.
Once n8n is running on your own server, the next step is connecting your first AI model to it. BULDRR AI’s guide on using OpenRouter with n8n shows you exactly how to add a free AI model to your self-hosted instance and run your first AI-powered workflow.