

What this workflow does
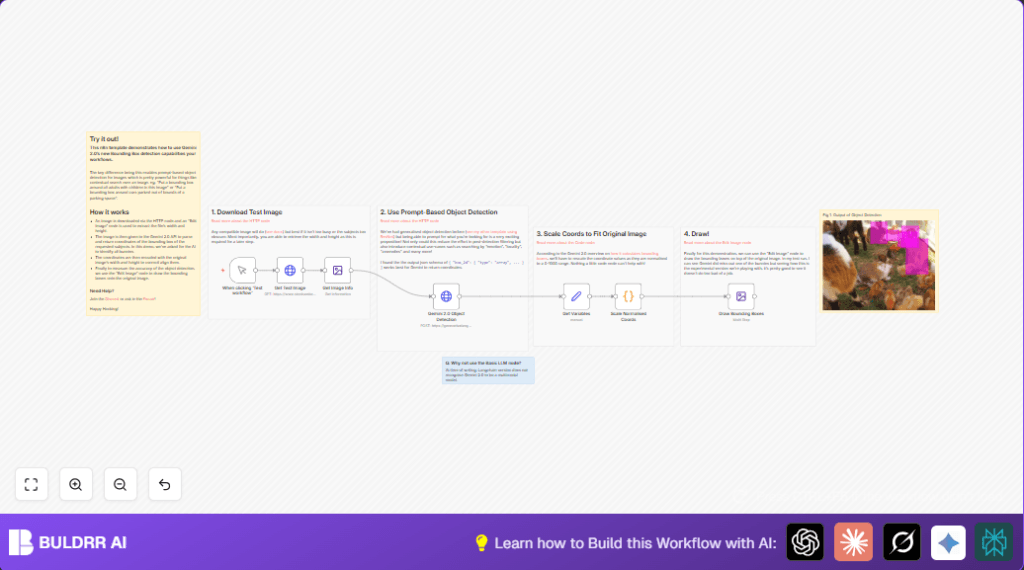
This workflow helps you find and mark all rabbits in a picture automatically. It solves the problem of spending too much time drawing boxes around animals by hand. You get an image with clear boxes around every rabbit after running it.
The workflow downloads an image, checks its size, asks Google Gemini 2.0 to detect rabbits by giving it the image and a simple prompt, gets box coordinates, scales them to the real image size, and finally draws the boxes on the image.
Who should use this workflow
The workflow is good for anyone who has many animal photos to tag but does not want to draw boxes manually. It works well for hobby photographers, petting zoo site managers, and small content creators who want fast, easy tagging with AI.
You do not need to be a coder or expert. You just need access to n8n and Google Gemini API, and you can automatically label rabbits in pictures.
Tools and services used
- n8n automation platform: Runs the workflow and nodes.
- Google Gemini 2.0 API: Does AI object detection from prompts.
- HTTP Request node: Downloads images and calls APIs.
- Edit Image node: Reads image size and draws boxes.
- Code node: Runs JavaScript to rescale boxes.
- Set node: Prepares coordinates and size data.
Beginner step-by-step: How to use this workflow in n8n
Download and import
- Download the workflow file using the Download button on this page.
- Open n8n editor (cloud or self-host n8n server).
- Click “Import from File” and select the saved workflow file.
Configure credentials and input
- Add Google Gemini 2.0 API credentials in n8n’s credential manager.
- Check the HTTP Request node called “Gemini 2.0 Object Detection” uses the correct credentials.
- Make sure the HTTP Request node named “Get Test Image” has the image URL:
https://www.stonhambarns.co.uk/wp-content/uploads/jennys-ark-petting-zoo-for-website-6.jpg. - If needed, update prompt text inside the body JSON of the Gemini request to detect other animals.
Test and activate
- Click the Manual Trigger node to start the workflow.
- Check the last node named “Draw Bounding Boxes” for the output image with boxes.
- If the result looks good, activate the workflow for production use.
Inputs, processing, and outputs
Inputs
- Image URL from the HTTP Request node.
- User prompt text telling AI what to detect (e.g., “rabbits”).
- Google Gemini 2.0 API credentials.
Processing steps
- Download image and get its width and height.
- Send image and prompt to Google Gemini 2.0 for bounding box detection.
- Parse JSON response containing normalized bounding boxes.
- Use JavaScript code to convert normalized coordinates (0–1000 scale) to real image pixels.
- Draw boxes on the original image at correct pixel positions.
Outputs
- An image file with pink boxes visibly drawn around detected rabbits.
- JSON data of bounding box coordinates (optional for further use).
Common problems and fixes
- Empty or error in bounding box JSON:
Check Google Gemini API response format. Inspect HTTP response raw data. Adjust JSON path in Set node. - Boxes not matching image:
Verify image width and height in Get Image Info node. Check if scaling code matches dimension units. - API call fails:
Ensure correct API Key and permissions. Confirm internet connection. - Too few or too many boxes drawn:
Match number of draw steps in Draw Bounding Boxes with detected coordinates count.
Customization ideas
- Change prompt in Gemini API call to find other animals or objects.
- Adjust bounding box color HEX in Draw Bounding Boxes node for different highlight styles.
- Build a loop or dynamic step generator for an unknown number of boxes.
- Use user-uploaded or database images instead of the fixed test image URL.
Summary of benefits and outcomes
✓ Save hours by automating rabbit detection in photos.
✓ Get accurate bounding boxes drawn on images ready for websites.
✓ Use simple prompt text to customize object detection.
→ Easily integrate this into larger image workflows or content management.
→ Ideal for non-technical users with step-by-step import and configuration instructions.
