
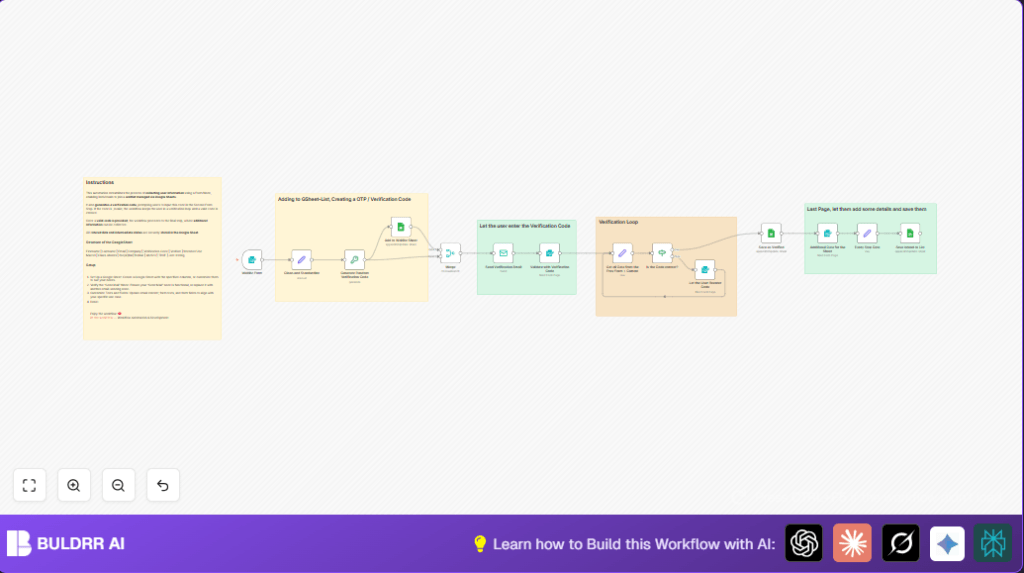

What This Workflow Does
This workflow helps manage a waitlist automatically. It stops manual errors like duplicate signups and missed verifications. The system sends a verification code by email and checks if users really want to join the waitlist. It also saves all user info in Google Sheets for easy tracking.
The result is less manual work and cleaner data for waitlist management.
Who Should Use This Workflow
This is for people who handle waitlists with many signups but want to save time. Anyone who needs to verify users before adding them to a list benefits. It works well when emails and company websites need cleaning and verification.
It suits startups or small teams without extra staff for manual tasks.
Tools and Services Used
- n8n: Automates the process with nodes and workflows.
- Google Sheets: Stores waitlist data and verification info.
- SMTP Email Service: Sends verification codes to users.
- Webhook and Form Nodes: Collect user data and verification inputs.
- Crypto Node: Generates secure 6-character OTP codes.
Inputs → Processing → Outputs
Inputs
- User submits first name, last name, email, and optionally company website via a form.
Processing Steps
- Clean email and company website data for consistency.
- Create a 6-character random verification code.
- Send this code to the user’s email automatically.
- User inputs the received code in a second form.
- Check if the code matches the generated one; loop if wrong.
- When correct, update verification status in Google Sheets.
- Ask user to provide intended use details via a third form.
- Save the intended use data back to Google Sheets.
Outputs
- A clean, verified waitlist in Google Sheets with user data and statuses.
- Users only get added after successful email verification.
Beginner Step-by-Step: How to Use This Workflow in n8n
1. Import Workflow
- Download the workflow file using the Download button on this page.
- Open your n8n editor and choose “Import from File”.
- Select the downloaded workflow file.
2. Set Up Credentials
- Add your Google Sheets API credentials in the Google Sheets nodes.
- Add SMTP credentials for your email service in the Email Send node.
- Make sure Google Sheet columns match the workflow: Firstname, Lastname, Email, Company, Verification-Code, Verified, Intended Use.
3. Review and Configure
- Update any webhook paths or email addresses if needed.
- Check the verification code length in the Crypto node and change if needed.
4. Test the Workflow
- Use the provided webhook URL to submit test data.
- Confirm the verification email arrives correctly.
- Enter the code in the verification form to check the validation loop.
- Submit intended use data to ensure it saves to Google Sheets.
5. Activate for Production
- Turn on the workflow in n8n to run automatically.
- Share the initial form webhook with users to start gathering waitlist signups.
For reliable hosting, consider self-host n8n on a server.
Common Edge Cases and How They Are Handled
- Duplicate signups avoided by checking the Email column before adding data.
- User enters wrong OTP code will get repeated chances until correct.
- Emails sent only if SMTP setup works correctly; test before launch.
- Whitespace and case differences in emails and codes are normalized.
Ideas to Customize the Workflow
- Change OTP code length by editing the stringLength in Crypto node.
- Add or remove fields in waitlist or final data forms to collect more details.
- Replace SMTP email node with your preferred email API like SendGrid.
- Edit email text to include your company brand or extra instructions.
- Add a retry limit to prevent endless verification attempts using counters.
Summary of Benefits and Results
✓ Less time spent manually managing waitlist data.
✓ Clean and verified user information stored in one place.
✓ Automated email verification ensures genuine signups.
✓ Easy form-based user data collection without extra staff.
→ Users only join waitlist after confirming email ownership.
→ You can monitor waitlist status live in Google Sheets.
