What this workflow does
This workflow automates QuickBooks tasks to create customers, make invoices, and send invoices by email.
It stops you from typing customer info and invoices manually.
By running it, new customers get added, invoices are made for them, and emails with invoices send automatically.
Who should use this workflow
This is for people who use QuickBooks Online and spend lots of time making invoices.
If managing many customers and invoices is slow or causes mistakes, this workflow helps fasten the process.
It fits best for freelancers, consultants, or small businesses wanting to save time.
Tools and services used
- n8n: Automation software to run the workflow.
- QuickBooks Online API: Service to manage customers and invoices.
- OAuth2 credentials: Secure token to connect n8n with QuickBooks.
Inputs, processing, and outputs
Inputs
- Customer name (e.g., Jack Ryan).
- Customer email (e.g., [email protected]).
- Invoice details such as line items and amounts.
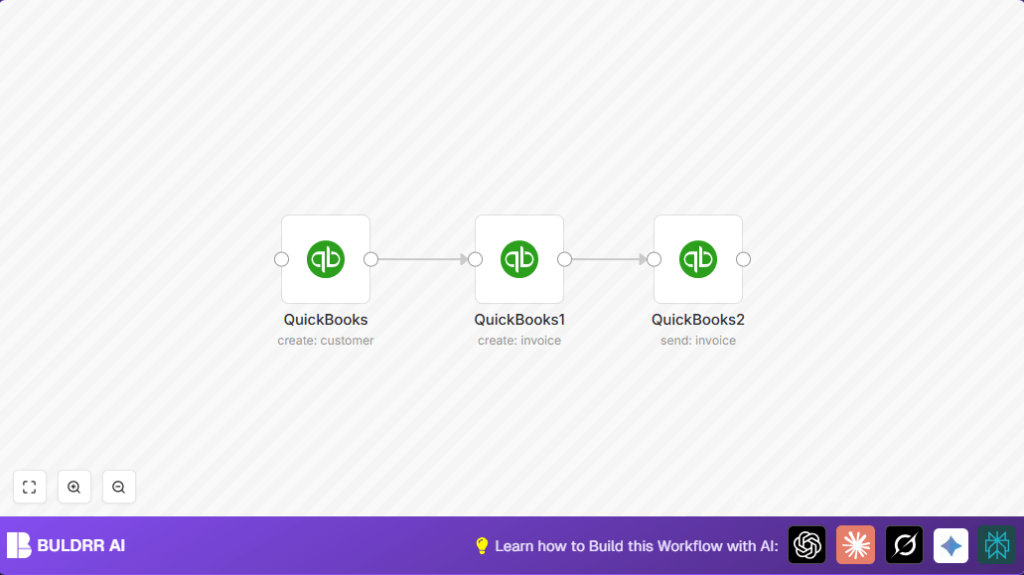
Processing Steps
- Create customer: A QuickBooks node adds a new customer using name and email.
- Create invoice: Another QuickBooks node makes an invoice linked to the new customer using the customer ID.
- Send invoice: A final QuickBooks node emails the invoice to the customer using the invoice ID.
Output
- A new customer record in QuickBooks.
- An invoice connected to the customer.
- The invoice sent by email from QuickBooks.
Beginner step-by-step: How to use this workflow in n8n
Step 1: Import the workflow
- Click the Download button on this page to get the workflow file.
- Open the n8n editor where you build automation.
- Use the Import feature and choose ‘Import from File’ to load the downloaded workflow.
Step 2: Configure necessary settings
- Add QuickBooks OAuth2 credentials in n8n if you have not done it yet. This connects n8n to QuickBooks securely.
- Check the customer email and name fields if you want to change them to your own data.
- Confirm the invoice line items and amounts match your services or products.
Step 3: Test the workflow
- Run the workflow manually to see if a customer is created, invoice is generated, and invoice is emailed.
- Check QuickBooks to make sure the new customer and invoice appear.
- Verify your email to confirm invoice delivery.
Step 4: Activate the workflow
- Turn on or activate the workflow in n8n to run automatically when you need it.
For automation on server or VPS, consider using self-host n8n to keep the workflow running all the time.
Customization ideas
- Change invoice line items to include multiple services or products.
- Use variable or dynamic data for customer details instead of fixed info.
- Add a Webhook node to start the workflow when a new customer signs up.
- Add a notification node, like email or Slack, to get alerts after invoices are sent.
Common problems and fixes
- Authentication failed: Check if QuickBooks OAuth2 credentials are valid and reauthorize if expired.
- Invalid CustomerRef error: Make sure the customer creation node returns the right ID and that invoice node uses this ID.
- Invoice sending fails: Confirm the invoice ID passed is correct and available from the previous step.
Summary of results
✓ Saves hours by automating customer and invoice creation.
✓ Reduces mistakes by using automation for customer and invoice data.
✓ Sends invoices fast by emailing directly from QuickBooks.
→ More time to focus on actual work instead of manual data entry.
