What This Automation Does
This workflow takes user requests from a Typeform form and puts them into ClickUp as tasks automatically.
It sorts requests by type, sets the right place in ClickUp, and adds all details and priority.
This saves time and stops errors from manual work.
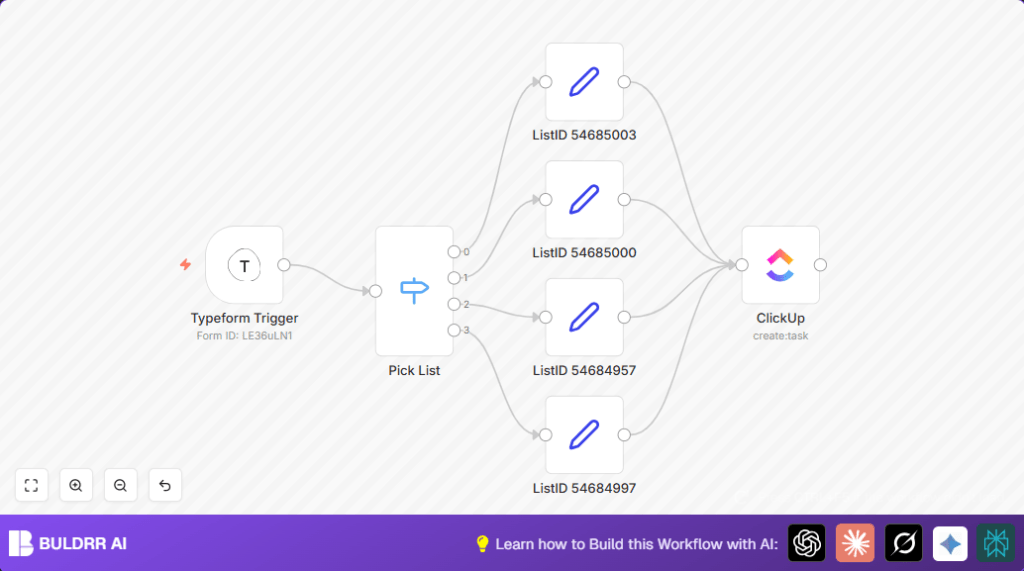
The workflow starts when someone sends a request via Typeform.
It reads the request type and routes it to the matching ClickUp list.
Then it creates a task with the title, description, requester info, and urgency.
Overall, the result is faster, easier task handling with less chance to miss or mix up requests.
Tools and Services Used
- Typeform: Captures user requests through a form.
- ClickUp: Manages tasks and projects.
- n8n Automation Platform: Connects Typeform to ClickUp with workflow logic.
Inputs, Processing, and Outputs
Inputs
- User request data from Typeform submissions: request type, title, details, name, email, urgency.
Processing Steps
- Typeform Trigger listens for new form submissions.
- Switch node checks the request type to decide which ClickUp list to use.
- After the Switch, each path uses a Set node to assign the proper ClickUp List ID.
- ClickUp node creates a new task with all request info, setting priority and description.
Output
- New tasks appear in ClickUp in the correct lists, fully detailed and prioritized.
Beginner Step-by-Step: How to Use This Workflow in n8n
Download and Import
- Click the Download button on this page to save the workflow file.
- Open the n8n editor and select Import from File to load the workflow.
Configure Credentials and IDs
- Add your Typeform API Key in the Typeform Trigger node.
- Add your ClickUp OAuth2 credentials in the ClickUp nodes.
- Check and update the ClickUp List IDs if needed to match your workspace.
- Review other fields like team, space, and folder IDs in ClickUp to fit your setup.
Test and Activate
- Submit a test response in Typeform and watch the workflow run in n8n.
- Verify the task appears properly in ClickUp.
- If all works, activate the workflow by switching on the Active toggle.
For running n8n on server or self hosting n8n, check self-host n8n for guidance.
Step-by-Step Guide to Building This Workflow
Step 1: Set Up Your Typeform Form
Create a form with fields for request type, title, description, name, email, and urgency.
Remember to enable API access in Typeform settings.
Step 2: Create the Typeform Trigger Node
Set formId to your Typeform form ID and authenticate with API key.
Test trigger by submitting sample data.
Step 3: Add the Switch Node to Route Requests
Set the field to check request type exactly.
Define outputs for each request type (Document, Presentation, Update, Workflow).
Step 4: Set ClickUp List ID for Each Request Type Using Set Nodes
Assign correct ListID value for each category.
Step 5: Configure the ClickUp Node to Create Tasks
Set authentication, team, space, folder, and list (dynamic to ListID).
Map task name, description, priority, requester name, and email.
Customizations ✏️
- Add new request types by expanding the Switch rules and corresponding Set nodes.
- Include due dates by adding a due_date field in the ClickUp node and a Typeform question.
- Send notifications via Slack by adding a Slack node after creating ClickUp tasks.
Troubleshooting 🔧
Problem: “No data received from Typeform Trigger“
Cause: Wrong form ID or missing webhook permission.
Fix: Check form ID spelling, enable webhooks, re-authenticate.
Problem: “ClickUp task creation failed due to auth error”
Cause: Expired or wrong OAuth2 credentials.
Fix: Refresh or recreate OAuth2 in n8n credentials manager.
Pre-Production Checklist ✅
- Test Typeform API token and webhook by submitting test data.
- Verify ClickUp List IDs match real lists.
- Run tests for every request type.
- Check OAuth2 tokens are current.
Deployment Guide
Turn on the workflow by toggling the Active switch.
Monitor logs for errors after activation.
Keep updating for new types or List IDs as teams change.
Conclusion
✓ Automates user requests from Typeform into ClickUp tasks.
✓ Saves hours and reduces errors in manual task entry.
✓ Improves response time and task tracking.
→ The team handles more requests with better focus.
→ The process stays clear and organized without extra effort.
