What this workflow does
This workflow gets customer data from a data store and updates a Google Sheet without manual work.
It solves the problem of wasting many hours on typing and fixing errors in data.
Users get an updated Google Sheet with accurate and current customer records fast.
Who should use this workflow
This is for people managing customer information who spend too much time copying data by hand.
It helps users who want fewer mistakes and want to save hours weekly.
Tools and services used
- n8n platform: Runs the automation workflow.
- Customer Datastore node: Gets customer information (id, name, email).
- Set node: Changes field names and adds current time.
- Google Sheets node: Inserts or updates rows using OAuth2 login.
- OAuth2 credentials: Secure access to Google Sheets.
Inputs, processing steps, and outputs
Inputs
Customer records with fields like id, name, and email.
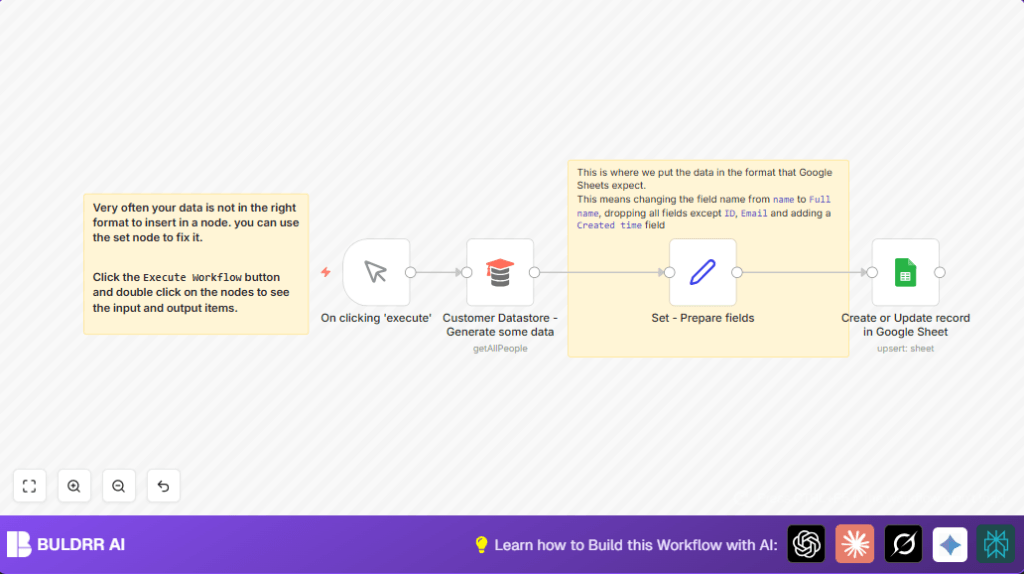
Processing steps
- Automated trigger starts the workflow.
- Customer Datastore node fetches all customers.
- Set node renames and keeps only required fields: ID, Full name, Email, and adds Created time as {{$now}}.
- Google Sheets node upserts records by matching ID to update or insert rows.
Output
Google Sheet updated with fresh and formatted customer data, no manual entry needed.
Beginner step-by-step: How to use this workflow in n8n
Importing and configuring
- Download the workflow file using the Download button on this page.
- Open n8n editor and choose “Import from File” to add the workflow.
- Add your OAuth2 credentials for Google Sheets under Credentials settings.
- Update the Google Sheet ID in the Google Sheets node if needed.
- Check customer datastore connection or settings to ensure it fetches data properly.
Testing and activating
- Run the workflow manually by clicking Execute to test data flow.
- Confirm the Google Sheet updates with new or changed customer info.
- Once happy, toggle the Active switch to turn on the workflow for production use.
- Optionally, replace manual trigger with a Cron node to run automation on a schedule.
- For self-hosting n8n workflows, check self-host n8n for hosting information.
Customization ideas
- Change output field names in the Set node to match Google Sheet columns.
- Add more fields such as phone or address if available in the datastore.
- Use different Google Sheet IDs to write to other spreadsheets.
- Schedule updates by replacing Manual Trigger node with a Cron node.
- Log workflow results with a Function node to Slack or files.
Common problems and fixes
Google Sheets update fails with permission error.
Cause: OAuth2 is not correctly set with spreadsheet access.
Fix: Re-authenticate Google Sheets credentials with correct scopes.
Set node outputs empty or missing fields.
Cause: Incorrect field mapping or missing ‘Keep Only Set’ option.
Fix: Double-check field names and enable the ‘Keep Only Set’ checkbox in the Set node.
Summary of benefits and results
✓ Saves several hours each week by removing manual data entry.
✓ Reduces errors from mistyped or missing customer data.
✓ Keeps Google Sheets updated automatically with latest records.
→ Makes customer data management faster and more reliable.
→ Ready to activate and use with simple imports and configuration.